


For the next Clock 23 I required something a little different, something in fact quite unusual, so Solidworks was not going to work for what I had in mind. I should explain that Clock 23 is going to be different, all I can say at the moment is that it will use the non round gear set found in clock 18 and an unusual dial, so I shall now explain how I created the dial for clock 23, just the process that is, the actual dial design for the clock may well be different to this.
In the last post on Clock dial construction I explained how ArtCam Express could be used to engrave numerals into the dial surface using V Bit Engraving, it is this technique that I shall use to create the new dial. With ArtCam Express it is possible to convert bitmap artwork into vector form, that can be used to create tool-paths for cutting on your CNC machine.
The design for the new dial was done in Photoshop, you can use any of the free photo editors listed below to create the dial, I actually started the process in Solidworks to draw the outline for the clock dial so that I knew that the artwork generated at the next stage would fit into the dial shape at the correct size and position. Saving that from Solidworks as a PDF file ensured I could load it at 1:1 scale into Photoshop.


The next step was to add some distortion to both numerals and the floral design so as to reflect the distortion of the clock face. This was done using the Liquify tool to manually distort the features. This is now complete so can be saved as a jpeg file for use in ArtCam Express.


The next step is to use the Bitmap to Vector Converter to firstly reduce the number of colours down to 2, Black and white. and then to do the vector conversion. Once this is seen to be satisfactory use the V Carving tool to create the toolpaths.
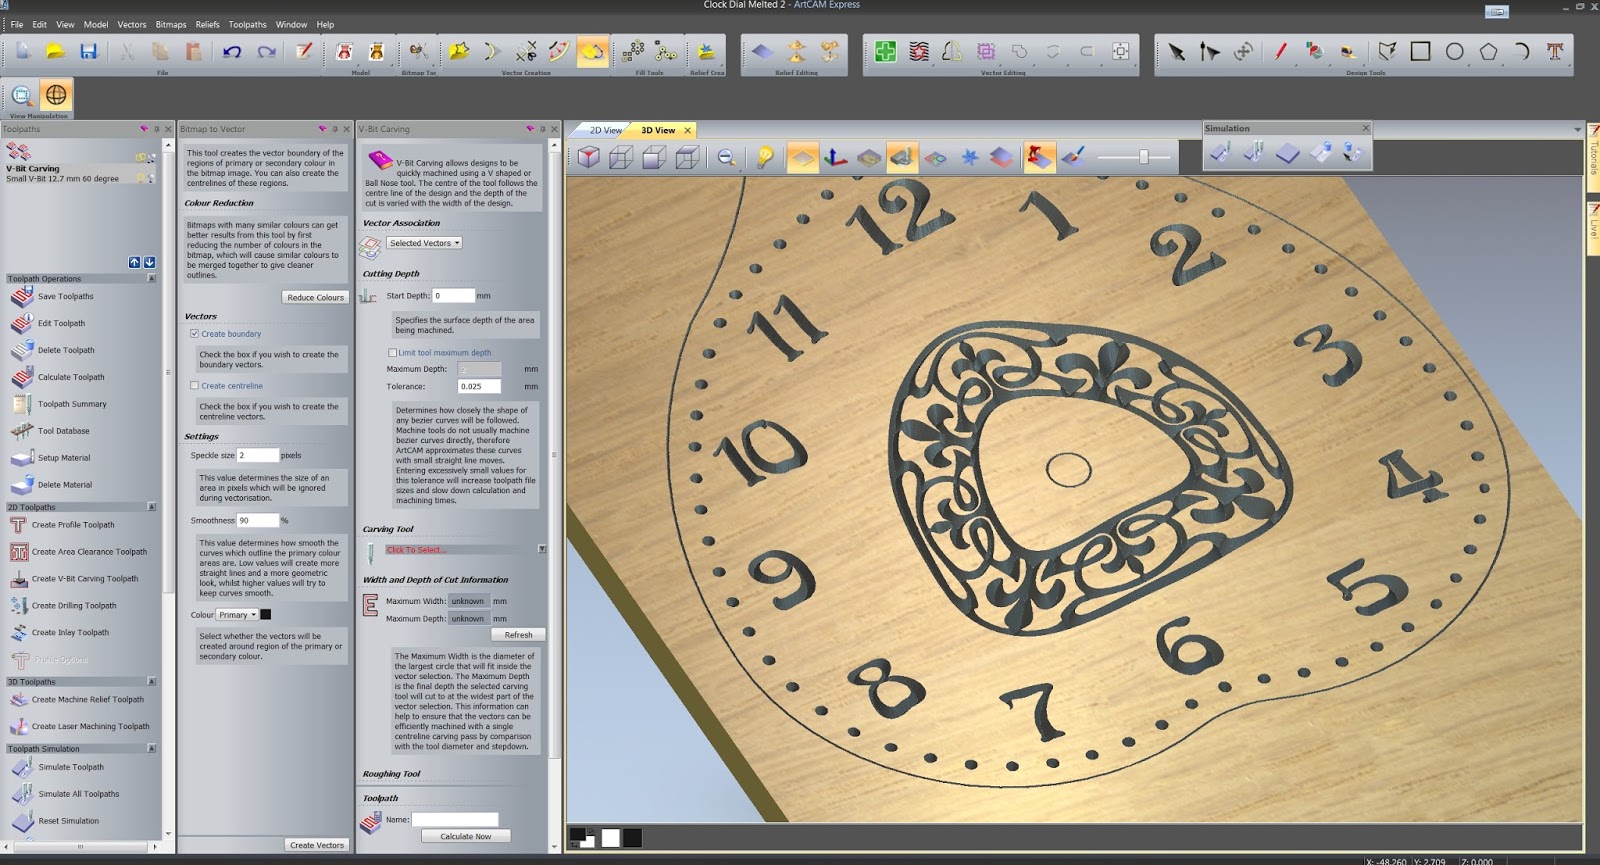
Finally use the simulation tool to create the tool paths and view the rendering of the finished result.
Photoshop Alternatives
Gimp
Paint.net
Pixlr
Picmonkey
Bit Map to Vector Conversion
Wintopo
Autotrace
VectorMagic
The clock dials are beautiful! Great work.
ReplyDeleteBut I could not help note that for 4 o'clock you used "IIII" (wrong) instead of "IV" (correct).